Selling at Farmers Markets as a Second Income

D

My husband and I were farmers market vendors for 8 years. We owned a bakery for 2 years but the other 6 years we did it out of our home.

Whether you sell baked goods or jams and jellies, produce or eggs or honey, you too can work towards becoming a market vendor at your local market.

At one point we did 2 local markets. One on Saturday mornings in our home town and one on Thursday afternoons in a neighboring town about a 1/2 hour away.

Here are a few things to think about when you are considering becoming a vendor.

  1. Do I have a product that people will buy?
  2. Do I have the proper insurance?
  3. Do I have the proper licensing if need be?
  4. How will I display my wares?
  5. Do I have someone to work my booth and do they have that winning personality to sell my product?
  6. Do I have the time to commit to approximately 15 weeks of selling?
  7. Do I have the passion?

These are all questions that we had to answer before we could fill out that application to be a vendor.

Do I have a product that people will buy?

In the past, people went to farmers markets to find great deals on bulk produce and sometimes less than perfect fruits and veggies at a deep discount. I remember going with my mom to the market and getting a handle basket of peaches that were seconds for a 1/3 of the price of a perfect basket and we would make jam. You could also get large quantities, such as a whole bushel of pickling cucumbers at a rock bottom price.

Today the farmers markets are a spring board for many smaller farmers that want to get their product out on the market quickly and meet face to face with their consumers on a weekly basis.

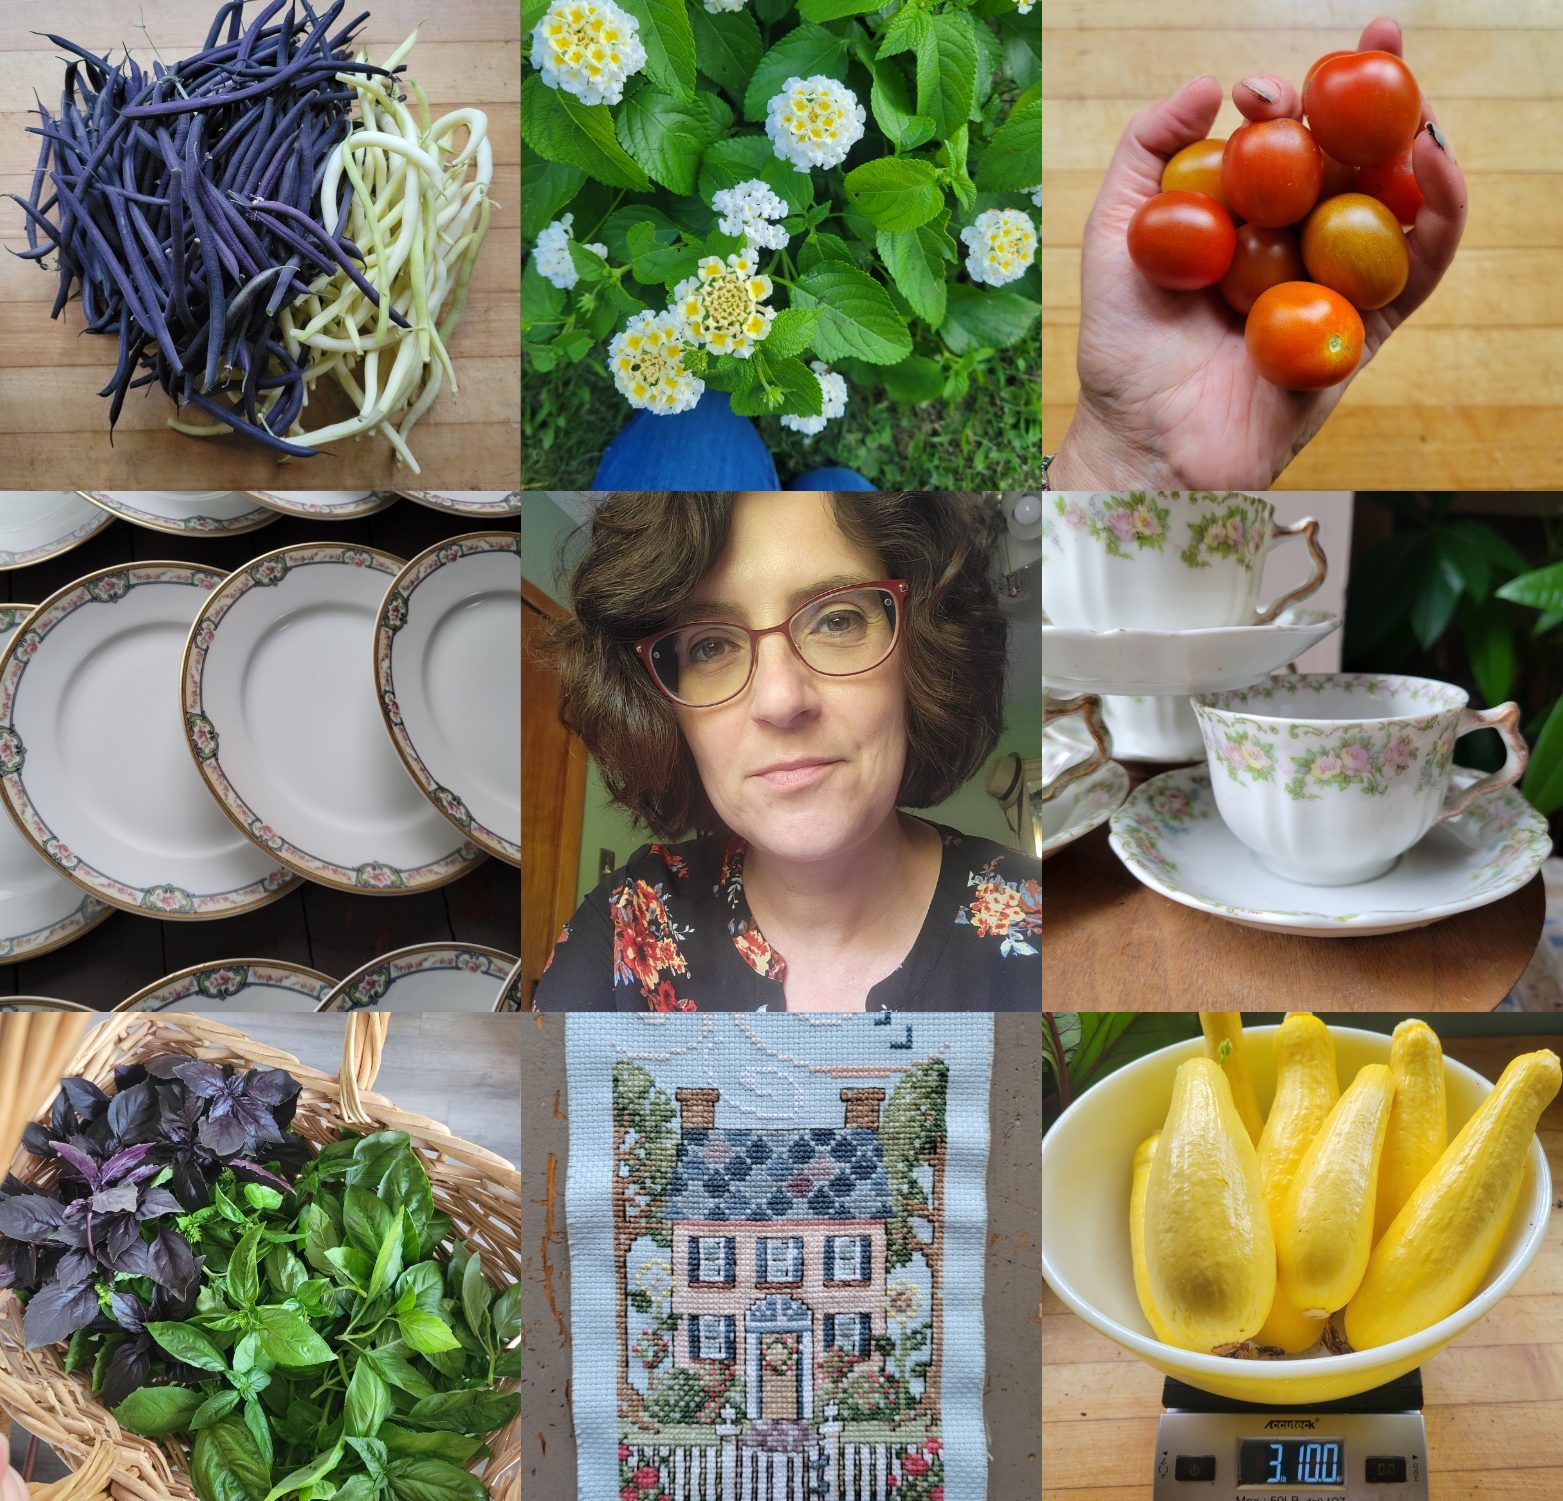
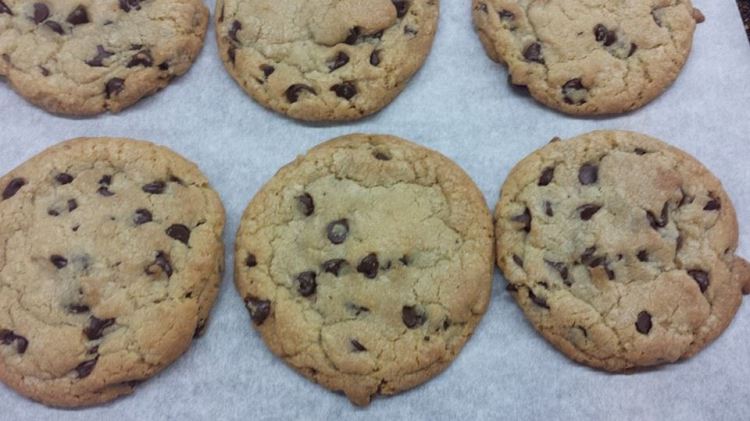
We were one of those vendors that benefited from seeing our customers every week. We had a product that people came to the market every week to buy, some religiously. Our scones. Out of everything we sold, and we sold a wide variety of products, our scones were the best seller for us. We baked over 300 scones a week and sold them at the market and at our bakery store front. If you didn’t get to the market early enough we would be sold out within an hour and a half.

Do you have a product that people will buy? Here is a list of products that are selling at the markets right now:

Organic produce or anything organic for that matter, free range eggs, honey, jams and jellies, cheeses, soaps, baked goods, coffee and teas, wine and beer, any type of veggies, any type of fruits, cut flowers, maple syrup, nut butters and mustards, gluten free baked goods, food trucks, art, crafts, local pork, beef or chicken, herbs and spices, plants, textiles and yarns.

This list could go on but I think you get the idea. As long as you are making or producing these items yourself and locally within a 50 mile radius your local market would love to have you as a vendor.

Do I have the proper insurance and do I have the proper licensing if need be?

This is very important. We started off with getting our home processor’s permit to do our baking in our home through the NYS Ag and Markets office in Buffalo. It was easy to obtain but it did restrict us from selling out of our home and what types of items we could sell. But hey, it was a start and we were thrilled! As a few years passed we got our full licensing from the Genesee County Health Dept when we opened our bakery.

If you are contemplating becoming a food vendor you need to take it a step further and get your vending license also through your county’s health department.

There are of course fees involved in every step of this process so consider that when planning to become a vendor. Many counties ask that you become food safe certified as well but that varies by county.

Insurance is another biggie. You will need at least a $1,000,000 liability policy for just about any market nowadays. It sounds intimidating but it really isn’t that hard to get and the cost, at least in my experience was just about $30 a month.

Call the insurance company that insures your home and vehicles and see if their underwriter does insurance for markets. If they say yes but it will cost over $100 a month, check with another insurance company.

How will I display my wares?

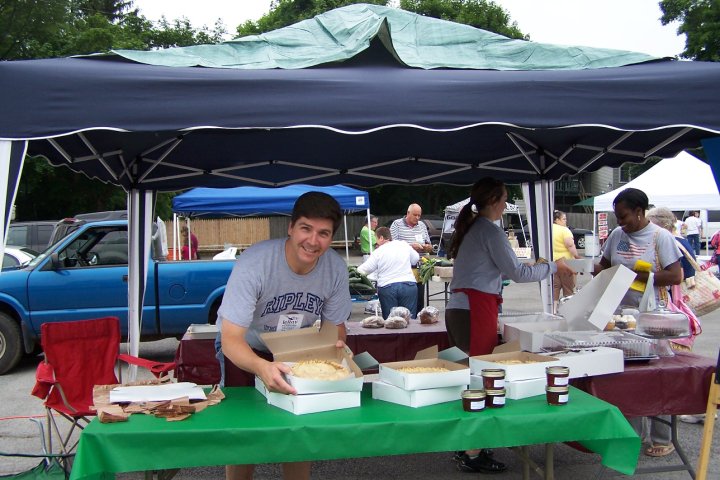
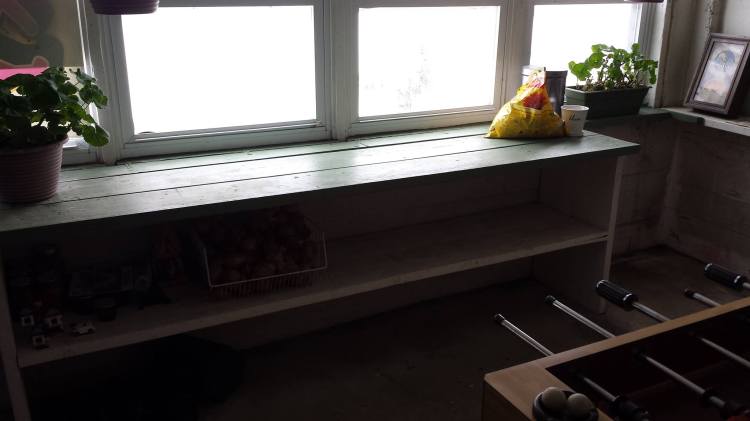
Displaying your product is very important. It needs to be eye catching and organized. Here are a few examples of displays at our market.

Shelving, baskets, crates, and colors are what is eye catching in all of these displays.

Do I have someone to work my booth and do they have that winning personality to sell my product?

I had a dream team to sell my products. My husband can charm the pants off of even the toughest customer and his side kick who just happens to be our church’s pastor was his partner in crime. I left them to do the selling each week because I knew selling was not my strong suit. Over the years we have had tons of help in our market booth. My sister and her two girls, my mom and of course Doug, my step-children, my sister-in-law, and tons of friends have had a blast helping us out and selling for us. Make it a family affair. Your children will learn a ton about handling money and working with the public at a young age.

Do I have the time to commit to approximately 15 weeks of selling?

Some markets ask you to commit to the entire season and other markets will let you come just a few weeks at a time and let you pick the weeks you would like to attend. We committed fully to the market every year and paid up front for the application fee.

It is a commitment either way that you will have to look at ahead of time. Will you be able to be at a market every Saturday from 9 am to 12:30 pm from June until October? That’s a pretty big commitment so really consider whether you have enough product to sell and you are able to fulfill that weekly commitment.

Do I have the passion?

Farmers markets can be a wonderful experience but also exhausting. It can be a very tough lifestyle if this is your sole income.On the other hand if you have passion for your product and want to connect with the consumer on a face to face weekly basis this is your starting point. One of our vendors started off with their goat milk cheeses selling their products at multiple local markets and only a few years later their passion has brought their products into the mega giant grocery market of Wegmans. Pretty impressive huh?

I could add a lot more to this conversation but this is a good starting point for anyone considering becoming a vendor at a local farmers market.

If you would like to become a vendor at the LeRoy, NY farmers market you can contact me via email at marymargaretripley@yahoo.com for more information. -MM

Prepping Mixes-Chocolate Chip Cookies

In the food service industry, prepping is crucial. Preparing ahead of time cuts your time in half when it comes to cooking for a crowd or getting ready for a party.

I have created more than a dozen dry mixes that I use in the bakery every day. I am going to share these mixes and the recipes to bake the finished products through the next few weeks.

Cookie mixes are my favorite because all you have to do is grab a couple bags of the mix, add eggs, some kind of oil (butter, shortening or oil) a little water and some vanilla and voila! In less than 10 minutes you’re scooping dough onto a cookie sheet. Sounds easy doesn’t it? It is!

Essentially what you are doing with these mixes is preparing the dry ingredients to your recipes ahead of time which is a real time saver especially if you prep multiple batches.

For the chocolate chip cookie dry  mix you will need:

1-1/2 cups granulated sugar

image

1-1/2 cups packed brown sugar

image

The two sugars make up your first bag

image

Twist tie the bag and set aside

image

Next you will need 4-1/2 cups of all purpose flour

image

2 tsp of salt and 2 tsp of baking soda

image

This makes up your second bag.

image

That’s it! Easy right? The reason we keep the sugar separate from the flour is that in most recipes it calls for the sugars to be creamed with the shortening and egg. Then you add the other dry ingredients so it is easier to have to separate bags.

image

At the bakery I build to 6 mixes per recipe. In other words for this chocolate chip recipe I would make enough dry mix for 6 batches of cookies. At home for the 3 of us I would probably make 3 batches to store away for later use.

Now when you want to make a batch of cookies here is the rest of the recipe.

Preheat oven to 350 degrees.

Dump the bag of brown and white sugars into a mixer bowl and add 2 cups of shortening, a 1/4 cup of water and 1 tsp of vanilla extract. Cream these ingredients with a mixer or by hand with a sturdy spoon. Next add 4 large eggs and mix in until incorporated.

Next, dump the second bag with the flour, soda and salt into the bowl with the creamed ingredients and mix until just incorporated. Do Not Over Mix! Then by hand add 4 cups of chocolate chips and fold in until just incorporated.

Drop spoonfuls of the dough onto parchment lined cookie sheets. If you want more uniform cookies use a spring action ice cream scoop to form the dough and drop onto the parchment lined cookie sheet.

Bake for about 12 minutes or until browned and not wet in the middle.

Here is the full recipe:

1-1/2 cups granulated sugar

1-1/2 cups packed brown sugar

2 cups of shortening

1 tsp vanilla extract

1/4 cup water

4 large eggs

4-1/2 cups of all purpose flour

2 tsp of salt

2 tsp of baking soda

4 cups semi-sweet chocolate chips

This recipe makes 4 doz good sized cookies.

chocolate chips

Here is a pic of my shelves at the bakery.

mixes

On these shelves I have mixes for chocolate crinkle cookies, snickerdoodle, chocolate chip cookies, brownies, ginger snap, cornbread, frosted sour cream cookies, oatmeal cookies, scones, chocolate chocolate chip cookies, jam thumbprints, and peanut butter cookies.

I will be sharing more mix recipes over the next few weeks so watch for more.

Also you can take your own recipes and make mixes out of them like I did. It makes life a whole lot easier when you have something already prepared in the pantry. -MM


Pie Challenge and the “Kids” are Up

I have really been slacking on my “Operation Pie Challenge” I left off at week #7 so this would be week #8. I am not going to do a recipe this week. Instead, I am going to show you a technique with pie crust that my Granny taught me years ago that I think you will find interesting.

This technique is best used on a berry pie with its dark purple or red color.

Start by having your bottom crust and filling ready. The filling pictured below was a mixed berry from our raspberries frozen from last season.

image

Next, roll out the top crust and instead of slicing completely from one side to the other as in a traditional lattice, create a cross shape instead.

image

As you can see next you cut each corner of the cross into an “L” shape.

image

Carefully lift the cross shape (it can be a little tricky not to break it, so go slowly) and place in the center of the filling. Next lift and position the “L” shaped pieces of crust just like they were on your floured counter but leave a little space so the color of the filling peaks through. Now add the corner pieces and crimp the pieces into place.

image

Bake as you would any pie and voila!

image

Not only is it impressive to look at but it tastes darn good too!

image


The Kids are Up!

Last week I showed you how I started my seedlings in pop bottles. My hubby and I always call them our “kids.”

The kids are up and out of the soil and stretching towards the sky. Here are a few pics!

image

image

image

So far the plum tomatoes, regular tomatoes, basil, cilantro and dill are all up. The peppers and celery will hopefully be up some time next week.

Are you starting any plants indoors yet? If so, what are you growing?

Can’t wait to report back next week. Happy baking and gardening everyone! -MM

Birthday Wishes

Looking back on past birthdays and special days like Valentine’s and Mother’s Day I realize now what I really want for those days. Not what you might expect though. I am not a girl who needs a lot of material things. I don’t need jewelry or roses or even an expensive night out.

It means more to me when I receive a homemade card or flowers picked from the roadside. Don’t laugh but I would LOVE a load of compost for my birthday. I know, I am such a nerd, right?

Although receiving a present is wonderful on my God given day, I really just want one specific thing. What is that?

A day free of worry.

What does that mean? What it means is that I want a day free of worrying what I should make for dinner, how I will pay the bills, whether my son will hurt himself dunking his basketball while doing trick shots outside, how my sales will be for the week, how many people will show up for church, whether I covered the butter because the cat likes to lick it when we are not looking.

I want a birthday that I don’t have to worry about running out of gas because I am too busy to remember to fill the tank, or a day without worrying about the van breaking down because it needs it’s transmission repaired. A day without worrying about how to pay the taxes or simply not having to worry if I am being a good mother, wife, daughter or friend.

Whether we like to admit it or not, we all worry and deep down what we really want is just one or two days a year when we don’t have to.

So guys it’s not the big, expensive, sparkly gifts we want, though they are nice and often we women dream of those things. No, it’s a day free of thoughts that if you worried about them for us for the day, it would be the best present ever. -MM

Baking for Lent

For me Lent is a journey every year. Easter is less commercial and I get to enjoy and reflect and think in silence without the glitz and mad shopping days of Christmas.

Lent and Easter traditions are handed down from generation to generation. A few years ago I researched recipes for Lent and Easter and found that almost every country has it’s own Easter bread. Poland, Italy, the Netherlands, America, England, Scotland and Belgium to name a few.

In our family we love our St. Joseph’s Day Bread and Hot Cross Buns. St. Joseph’s Day is March 19th and is a traditional Sicilian bread to honor St. Joseph, Sicily’s patron Saint.

Hot Cross Buns are traditionally eaten in England on Good Friday. The cross atop the bun was said to symbolize the Crucifixion. Although there is no real confirmation on who actually created the Hot Cross Bun it is said they do have ancient origins dating back to the 12th century.

I have been baking St. Joseph’s bread since I was in my 20’s. It can be a difficult bread to master. Humidity, quality of yeast and enough proofing time are all factors in successfully making this bread.

If you have never tasted this bread you have missed out on its soft, anisey, rich flavor. Some have told me the smell of the bread has instantly brought them back in time. I have had people in their 90’s who haven’t had it in years eat it and feel instantly transported back to their grandmother’s table. It is a magical bread I say.

This recipe makes 9 or 10, 1-lb. round loaves (or you can braid them). You may also halve this recipe because not many people have the mixer capacity although this bread was mostly kneaded by hand.

St. Joseph’s Bread Recipe

5 cups warm water

3 Tbsp yeast

4 eggs

1-3/4 cup sugar

1-1/4 cup shortening

2 Tbsp salt

2 Tbsp baking powder

2 Tbsp anise seeds

5 lbs. flour

Mix the water and yeast and let sit for a minute or two to dissolve the yeast. Don’t get that yucky yeast from the grocery store. I buy mine in bulk at Sam’s or BJ’s or Costco. I store the yeast in the fridge or you can freeze it.

Next add the eggs, sugar, shortening and salt. Then mix in half the flour. Then add the baking powder and the anise seeds. Mix until the flour in incorporated and then slowly add the rest of the flour. When you have a soft ball of dough and it clears the sides of the mixing bowl or your hands don’t get sticky if you are hand mixing, knead for about 8-10 minutes until smooth and elastic. Add more flour if it gets sticky. Believe me if you hand mix this recipe you will get a full body workout. But it will be worth it!

Place the kneaded dough in a large greased bowl and cover tightly with plastic wrap. Here is the crucial part. Let rise in a warm place for at LEAST 2 hours. This bread takes a LONG time to rise properly. Also the quality of the yeast makes a big difference too. I have thrown more batches of this bread out because the yeast from the grocery stores sucks. If you want to be a serious bread maker don’t waste your time with the store brand yeast.

After the dough has risen to double it’s original size roll it out of the bowl onto a floured surface. Punch it down and divide the dough into 10 pieces. If you have a scale, weigh each one to get even sizes.

Either braid or shape the dough into round loaves and place on parchment lines baking trays or in greased disposable pie pans.

Let double again in a warm spot, covered with a clean dish towel. (At least another hour or so.)

After the dough has proofed again brush the tops of them with an egg wash and sprinkle either sesame or poppy seeds on them.

Bake at 350 degrees for approximately 20 minutes. They will be a golden brown and smell Heavenly!


st-joes-bread

Hot Cross Buns Recipe

In my opinion Hot Cross Buns should be made with either raisins or currants but many commercial recipes add candied fruit which is way too close to a fruit cake for me.

1-1/2 cups warm milk

1-Tbsp yeast

1/3 cup  sugar

1 tsp salt

1/3 cup melted butter

2 eggs

4 cups flour

3/4 cup of raisins or currants

1/2 tsp mace

The original recipe I tried had 5 cups of flour and it really dried the buns out. I prefer the 4 cups myself but you can always add more if the dough it too sticky for you. I prefer the soft sticky dough because it makes a softer, less dense bun.

Mix the yeast and the warm milk together. Add the melted butter, sugar. salt, eggs, currants or raisins and the mace in. Add the flour in a cup at a time until a soft ball forms. Knead the dough for about 5 minutes adding enough flour here and there to keep it from sticking too much. Dough will be soft and probably a little sticky. That is ok. Place the dough in a greased bowl and cover tightly with plastic wrap. Let rise in a warm place until doubled in size.

When doubled in size turn the dough out onto a floured surface and punch down. Divide the dough evenly depending on how big you want the buns to be. I made 12 out of this recipe but they were really big so I would make them smaller next time.
image

Form each piece of dough into a ball and place in a greased 9 x 13 cake pan or a parchment lined cookie sheet. Make sure the buns slightly touch each other.

Let rise again in a warm place covered with a clean dish towel.image

After doubling in size again brush the tops with egg wash and bake at 375 for 25 minutes or until golden brown.Let cool.image

For the Cross: mix together a cup of confectioner’s sugar, 2 Tbsp milk and 1/2 tsp of vanilla. Drizzle the frosting in a cross like pattern over each bun. Don’t worry if it is not perfect. Mine never are! Eat with butter and enjoy! (Sorry I forgot to take a pic of them with the cross on them).


Does your family have Easter baking traditions? I would love to hear from you! -MM

Seed Starting

workbench2

I worked on my gardening goals today and started some seeds indoors. Every year I do this and I thoroughly enjoy it. I take my phone down in the basement with me and prop it on the windowsill and watch Desperate Housewives with my Hulu phone app. Just me, and Susan, Bree, Lynette and Gabby gettin’ dirty with seed starter.

Here are a few pics of what I accomplished today.

Every Fall I dig up my geraniums and pot them and then overwinter them in our basement. Today I cleaned them all up, getting rid of any dead leaves and flowers. Now I will make sure they get plenty of sunshine and fertilizer to get them ready to go outside in a month or so. It is supposed to be mid sixties this week so I might put them outside just for the day to give them a boost.
image

image

image

Believe it or not this plant is a tomato that I rescued last fall while bringing in the geraniums. It had just sprouted and only had 2 leaves. It has grown steadily and surely over the winter and I just re-potted it this afternoon in it’s new home.
image

Last year I posted about starting my seeds in a pop bottle construction container. I liked it so much I decided to expand my pop bottle garden this year.

I started paste tomatoes, regular tomatoes, bell peppers, jalapenos, basil, dill, cilantro and celery. I’ll start cabbages and some other plants in a couple of weeks

Thank you to my wonderful mom-in-law for providing me with the bottles!

image

image

image


I can’t wait to update you on their progress. I am sure by next week they will have sprouted.

Unfortunately though by the end of the Desperate Housewives episode I was watching, Mike Delfino, Susan’s husband was shot. Damn, he was cute too. Oh well, keep calm and dig in the dirt I always say! -MM


My Gardening and Preserving Goals for 2016

In past years when it comes to my gardening and preserving goals I tend to just wing it. Whatever canning recipe sounds good I’ll try. Whatever new plant or seed looks colorful and fun I’ll grow it. Unfortunately this leaves me by the end of the growing season with canned goods I will never use and produce that’s not very practical for our needs.pretty cabbages

This year I want to have a plan in place to eliminate the guess work. In a journal I have written a carefully researched list of herbs that I want grow for their medicinal and culinary purposes. I have also thoughtfully picked out the veggies/fruits I will need for the preserving recipes I want to try and I have listed the goods I want to get preserved

This is a VERY high achieving list. I am realistic in saying I probably will not do all of this this year but it is a goal of mine and now I will have a place to look for inspiration when I need motivation.

Okey Doke! Here we go!

I spent a while researching these herbs, plants and flowers and what they are used for. Many make good companion plants to certain veggies in the garden so I will most likely add those plants to the garden beds to enrich the soil and to aid its companion buddy.

  1. Yarrow (can be invasive so it will have it’s own bed)
  2. Anise Hyssop
  3. Garlic
  4. Chives (Companion for Carrots) (I grow now)
  5. Aloe Vera
  6. Lemon Verbena
  7. Dill
  8. Chervil
  9. Horseradish Companion for Potatoes)
  10. Artemisia
  11. Tarragon (Companion for Eggplant and Peppers)
  12. Borage
  13. Calendula
  14. Caraway (Companion for Peas)
  15. Bachelor Button
  16. Chamomile  (Companion for Cabbages and Onions)
  17. Cilantro
  18. Lemongrass
  19. Dianthus Clove Pink
  20. Purple Cone Flower (Echinacea)
  21. Fennel
  22. Sweet Woodruff
  23. Lavender (I grow now)
  24. Lemon Balm (I grow now)
  25. Mint (I grow now)
  26. Catnip (grows wild around here)
  27. Basil (annual that I start from seed)
  28. Oregano
  29. Parsley (I grow now)
  30. Anise
  31. Purslane (Grows wild here and considered a weed)
  32. Rosemary
  33. Sage (I grow now)
  34. Dandelion (Also a common weed)
  35. Thyme
  36. Nasturtium
  37. Valerian
  38. Violet (Grows wild here)
  39. Pansy
  40. Eucalyptus

wpid-20150824_180737.jpg

For our vegetable garden I selected plants  based on what I needed for my canning recipes and what I would use fresh.

  1. Asparagus (will not produce until year 3)
  2. Strawberries (will produce better the second year)
  3. Rhubarb (will plant this year and harvest will begin next year)
  4. Corn
  5. Popcorn
  6. Sweet Peppers
  7. Banana Peppers
  8. Eggplant
  9. Onions (My #1 priority every year for storage)
  10. Snap Bean Bush – Purple, yellow and green
  11. Snap Bean Pole
  12. Dry Beans
  13. Peas
  14. Spinach
  15. Lettuce
  16. Cabbage
  17. Swiss Chard
  18. Beets
  19. Radish
  20. Carrots
  21. Cucumbers
  22. Pumpkins
  23. Gourds
  24. Winter Squash
  25. Zucchini
  26. Yellow Squash
  27. Cantaloupes
  28. Water Melon
  29. Sunflowers
  30. Tomatoes
  31. Celery
  32. Broccoli
  33. Potatoes
  34. Jalapenos
  35. Yellow Tomatoes
  36. Paste Tomatoeswpid-20151014_132108.jpg

And finally the preserving list. It’s even longer than the other two. I know, I know. It’s a lofty goal but it’s something I will try my best at accomplishing. And if I get it all done we won’t have to go to the grocery store until Spring. (Just kidding).

  1. Strawberry Jam
  2. Grape Jelly
  3. Black Raspberry Jam
  4. Red Raspberry Jam
  5. Blackberry Jam
  6. Cherry Jam
  7. Peach Jam
  8. Pear Jelly
  9. Apple Jelly
  10. Honeyed Yellow Tomato Butter
  11. Canned Cherries in Syrup
  12. Canned Cherry Pie Filling Sweet
  13. Canned Cherry Pie Filling Sour
  14. Basil Banana Pepper Jelly
  15. Apples in Syrup
  16. Grape Juice
  17. Pear Juice
  18. Tart Cherry Juice
  19. Pickled Beets
  20. Canned Beets
  21. Vegetable Stock
  22. Vegetable Soup
  23. Tomato Sauce
  24. Blackberry, Red Raspberry, Peach, Cherry Cordials
  25. Chili Sauce (Two different kinds)
  26. Bread and Butter Pickles
  27. Frozen Corn
  28. Frozen Peppers
  29. Frozen Beet Greens/Chard
  30. Make my own pectin out of green apples
  31. Sweet Pickle Relish
  32. Dill Pickle Relish
  33. Red Root Relish
  34. Ketchup
  35. Red Hot Sauce
  36. BBQ Sauce
  37. Lemon Sage Wine Mustard
  38. Dilly Deans
  39. Pickled Roasted Red Peppers
  40. Pickled Hot Peppers
  41. Spiced Red Cabbage
  42. Sweet Crisp Pickles
  43. Crushed Tomatoes
  44. Whole Tomatoes Packed in Water
  45. Canned Green Beans
  46. Frozen Peas
  47. Frozen Winter Squash and some stored whole
  48. Chili
  49. Pear Juice
  50. Tart Cherry Juice

wpid-20151014_080650.jpg

I will also be drying the herbs and many fruits and veggies in our 2 dehydrators.

What I haven’t mentioned is that we have 3 apple, 2 sweet cherry, 1 sour cherry, 2 pear, 2 peach and 1 apricot (1 died) and a hazelnut (1 of these died also). Plus blackberry, red raspberry, black raspberry, and blueberry bushes.

fruit1

So these are the goals. Am I missing anything? Am I nuts? We will find out! -MM


What’s for Dinner Update

I am going to take a break from What’s For Dinner until Spring. I love my Winter comfort food but there are just some dinner ideas better left for when there are fresh, home grow veggies and a grill.

Thank you for your enthusiasm for this series. I hope I have given you some great ideas for dinner. I will be back with more. I promise!

– MM

What’s For Dinner Week #5

It’s been a rough couple of weeks for our household. I have been sick for most of it with a nasty cold/virus that made me miss 3 days of work, my mom was supposed to have surgery last week on her shoulder and after waiting for hours at her scheduled time of surgery they ended up not being able to do it due to a complication and now poor Doug is sick with the yuck. So I apologize for the late posting again. Here are week #5’s meal ideas.

Sausage, Peppers and Onions

Whether slow cooked in the Crockpot all day or grilled on the grill pan, this is a hearty and relatively inexpensive meal. Add some steak fries and yum!!

Tuna Noodle Casserole

I use a whole bag of wide egg noodles, 2 cans of white tuna packed in water, drained, 1 can of cream of mushroom and one can of cream of celery soup with milk added to both cans and a small bag of frozen peas. After you cook the noodles add in all of the rest of the ingredients stirring gently together then pour into a casserole dish. Top with crushed Ritz crackers or crushed potato chips. Salt and pepper to taste and add fresh parsley if you like too. Bake at 350 degrees until hot and bubbly about 30 minutes.

Spaghetti and Meatballs

In lieu of most people either using their own family recipe or preferring the jarred kind I will let you use whatever recipe you like for this. Meatballs are good homemade or from a freezer bag. Hey it’s a meatball how can you go wrong either way right?

Chicken Stir Fry

Remember those little, tiny corn on the cob that Tom Hanks chewed on in the movie “Big’? This dish always reminds me of that because I can’t resist using a can of baby corn in this recipe.

For the Sauce: Combine 1 cup water, ¼ cup soy sauce, 2 Tbsp cornstarch, 1 tsp instant bouillon granules, ¼ tsp ground ginger. Stir to dissolve everything and set aside.

Chunk or thin slice boneless skinless chicken breast. Salt and pepper to taste. Preheat a few Tbsp of cooking oil in a wok or stainless steel frying pan. Add chicken and stir fry until cooked through about 10-15 minutes. Remove from pan and set aside.

To the hot pan add veggies such as broccoli, julienned carrots, mushrooms, onion and/or garlic. Stir fry until the crunch is just gone. Remove from heat.

Next, add the sauce to the center of the pan. Stir and cook until thickened and bubbly.

To the sauce add more veggies like the corn, bamboo shoots, water chestnuts, frozen snow peas and bean sprouts. None of these take long to cook that’s why they are added at the end. Cook for a couple of minutes in the sauce to warm everything up and defrost the peas.

Add in all of the rest of the veggies and the meat to warm up and finish cooking. Cook another few minutes in the sauce then serve over rice.

Deluxe Turkey BLT Clubs

An easy meal! Get your favorite deli turkey, cooked bacon, tomatoes and your fanciest lettuce plus mayo of course and start stacking it all on your favorite toasted bread. Three slices of bread make it a club! Put a frilly toothpick through it, add some sweet potato fries and you have dinner. Enjoy!

Crockpot Chili Sauce Chicken with Mashed Potatoes

This has got to be the easiest recipe ever! If you can your own homemade chili sauce like I do just pop open the jar and dump it over cut up pieces of chicken in the Crockpot and that’s it! Turn it on low and let it cook until the meat just falls off the bone. If you don’t have your own chili sauce you can buy a variety of kinds at your local grocery store. Whip up some mashed potatoes and a veggie and you are all set. Easy peasy!!

Leftover Night

Take the night off from cooking and enjoy those leftovers!


I would love more ideas for dinners. What are you making for dinner? Please post in the comments. -MM


All of these recipe amounts are based approximately on 4 people and might have to be adjusted if you have teenagers with a healthier appetite.

What’s for Dinner Week #4

Sorry this is a day late! I was under the weather all last week and I am just getting caught back up. Here are the dinner suggestions for week #4.

What’s for Dinner Week #4

Chicken Kiev

Ingredients:

Boneless Skinless Chicken Breasts

Salt and Pepper

Cold Butter

Chives and Parsley, Dried or Fresh

Bread Crumbs

Eggs

All Purpose Flour

Frying Oil

In between 2 pieces of wax paper flatten multiple breasts with a flat kitchen mallet or rolling pin. Once flattened and thin enough to roll easily set aside and finish flattening all of the chicken. On a cutting board lay one of the breasts face down and put a pat of cold butter at one end. Sprinkle breast with salt and pepper and parsley and chives. Carefully pick up one end and roll the butter and herbs up into a short log. Secure with toothpick if it doesn’t want to stay closed. Repeat until all of the breasts are used. You will have some large and some small when finished.

Set up your breading station with three wide mouthed bowls. The first with flour, the second with 2 beaten eggs and the third with the breads crumbs. Coat a rolled breast first in the flour then move it to the eggs to coat it and then to the breadcrumbs. Repeat until all of the chicken is coated and ready to fry. This is a messy process so be prepared to wash your fingers multiple times along the way.

Heat oil such as canola or peanut oil in a cast iron skillet. Oil should come to about halfway up the sides of the pan. Fry each breast until thoroughly cooked and golden brown on each side. About 15 minutes for the largest down to 8-10 minutes for the smaller.

Serve with mashed potatoes and my dad’s favorite, green peas.

Build your own Pizzas

I love using pre-baked Naan flatbreads for this because they are quick and easy and come in lots of different varieties. My store carries white, wheat and garlic and two come in a package.

Cheese and pepperoni may be your favorite but don’t hesitate to try something different like artichoke and feta, or spinach, tomato and ricotta. There are endless possibilities!

Stuffed Shells

The reason I like writing this series is to not only give you new recipe ideas but also to perhaps remind you of recipes you haven’t made in awhile for whatever reason.

Stuffed shells is one of those recipes for us. If you have made them in the past, I urge you to go find your recipe in your recipe box and go to town with it. If you have never made them before, here is a classic recipe for stuffed shells from Chrisy at Homemadehooplah.com.

http://homemadehooplah.com/recipes/ricotta-stuffed-shells-with-marinara/

Chili

Everyone has their own favorite chili recipe. I bet some are even award winners. Am I right? Or passed down from previous generations?

In any case here is mine.

Brown 1 lb. of lean ground beef in a heavy bottomed pot along with 1 chopped medium onion, 1 clove of minced garlic and 1 whole sweet green or red bell pepper chopped small.

Add a large can of crushed tomatoes (28 oz. I think?) and a small can of tomato paste, plus water to fill the small can.

Next I add a can of black beans and a can of red kidney beans, including all of the liquids from the cans.

Then, the spices. I swear it takes almost a whole container of chili powder to get it tasting right but let’s just say it is at least 3 Tbsp. Then a couple of bay leaves, salt and pepper, red pepper flakes, a couple of Tbsps. of sugar to mellow it and cut the acidity and fresh parsley if you have it otherwise dried will do.

Simmer over low heat for at least 2 hours stirring it frequently to prevent scorching.

Serve with sides of sour cream, shredded cheese and oyster crackers.

If you like it spicier by all means add all the jalapenos or chili peppers you like.

Beef Stew

Beef stew is another one of our cold weather favorites. Stew with warm buttered bread…Yum!

Coat 1-1/2 to 2 pounds of stew meat in flour, shake off excess. In a Dutch oven heat 2 Tbsps of oil. Add the floured meat and brown meat on all sides. I deglaze the pan with a cup of beef stock just so I can scrape up the flavorful drippings on the bottom of the pan. It will also start to thicken because of the flour. If you prefer a bolder flavor you can deglaze the pan with a good red wine.

Add a can of whole peeled tomatoes along with the liquid in the can. Then add 2 celery stalks chunked including the greens and 3 carrots peeled and chunked and 2 medium to large onions chunked to the pot. Add your choice of herbs. I like parsley, and Thyme or Sage. Salt and pepper to taste.

Cover and let simmer on low for a good two hours in the Dutch oven, stirring occasionally to prevent scorching.

About 1-1/2 hours into the cooking process I usually add potatoes chunked up. They don’t take as long as the rest of it does and then if you like mushrooms you can add them then too. Mushrooms add that rich earthy flavor to a stew.

Serve when meat is tender and breaks apart easily with a fork. Add more stock if the stew boils down too much and becomes dry.

Serve with homemade French bread.

Baked Ham

There are many different types of hams out there. Some boneless, some bone-in. Some are sweeter like honey or brown sugar, some are saltier. Some are pre-sliced and some are do-it-yourself. Either way any ham you get is already fully cooked so all you have to do is put it in the oven covered until the internal temp is satisfactory. Easy peasy right?

I like the simple approach of just putting the ham in a roasting pan and covering it with tin foil until hot and browned. But for those of you that like to pretty your ham up with things such as pineapple slices, cloves and cherries go for it. Any kind of ham is good to me!

Serve with a side of potatoes or perhaps squash.

Leftover Night

Ham sandwiches anyone?


Note: All of these recipe amounts are based approximately on 4 people and might have to be adjusted if you have teenagers with a healthier appetite.


From The Pumpkin Patch

A wholesome lifestyle blog where it's autumn all year round.

Daisy Stitches and Art

“A Stitch in time - creates wonders in art.

Sewing Etc.

Sharing my adventures in the needle arts and life!

Petals and Pins

Quilting | Stitching | Gardening

One Hundred Dollars a Month

Join Mavis Butterfield for vegetable gardening and canning tips, easy recipes, and saving money strategies (Rug hooking, too!). Simple living at its best!

Gardening Nirvana

Sharing my journey in and out of the garden

The Snail of Happiness

small steps to a kinder world

Cocktails In The Library

Talking about great books while enjoying tasty libations!

Autumn Leaves & A Spring Breeze

Leading a happy and sustainable lifestyle

Midwest Mattie

just living my best life in the midwest.

Sewing Beside the Sea

All things made with my needle and thread

thecraftycreek

Making and creating